
필자는 Spring Data JPA 를 많이 사용 중에 있다.
초반에 해당 문제로 골머리를 앓았던 기억이 있는데 그때 기억도 나는 겸 다시 정리도 하는 겸하여 정리해보고자 한다.
준비
우선 테스트를 진행해 볼 엔티티를 작성하자.
책과 작가를 엔티티로 삼았으며 책 → 작가를 의존하는 ManyToOne 관계를 맺어주었다.
코드는 아래와 같다.
Entity
@Entity
@Getter
@NoArgsConstructor
@ToString
public class Book {

    @Id @GeneratedValue(strategy = GenerationType.IDENTITY)
    private Long id;

    private String title;

    @ManyToOne
    private Author author;

    public Book(String title, Author author) {
        this.title = title;
        this.author = author;
    }
}
@Entity
@Getter
@NoArgsConstructor
@ToString
public class Author {

    @Id @GeneratedValue(strategy = GenerationType.IDENTITY)
    private Long id;

    private String name;

    public Author(String name) {
        this.name = name;
    }
}
위와 같이 코드를 작성하고 Test Code 를 작성해보자.
Test Code
@DataJpaTest
public class FetchTest {

    @Autowired
    AuthorRepository authorRepository;

    @Autowired
    BookRepository bookRepository;

    @BeforeEach
    void init () {
        Author author1 = new Author("name1");
        Author author2 = new Author("name2");

        authorRepository.save(author1);
        authorRepository.save(author2);

        Book book1 = new Book("book1", author1);
        Book book2 = new Book("book2", author2);

        bookRepository.save(book1);
        bookRepository.save(book2);
    }

    @Test
    void test() {
        List<Book> all = bookRepository.findAll();
        all.forEach(System.out::println);
    }

}
이 테스트를 실행하면 쿼리가 1번 나가고 문제가 없이 Book에 대한 콘솔이 찍힐 것이다.
JPA 를 조금이나마 공부를 해봤을 경우
@ManyToOne // DEFAULT FETCH_TYPE = EAGER
private Author author;
ManyToOne의 기본 Fetch 타입이 Eager 라는 것을 알 수 있는데.
쿼리가 왜 1번이 나갈까?
이유는 @DataJpaTest에 있다.
DataJpaTest
해당 어노테이션에 들어가보면
@Target(ElementType.TYPE)
@Retention(RetentionPolicy.RUNTIME)
@Documented
@Inherited
@BootstrapWith(DataJpaTestContextBootstrapper.class)
@ExtendWith(SpringExtension.class)
@OverrideAutoConfiguration(enabled = false)
@TypeExcludeFilters(DataJpaTypeExcludeFilter.class)
@Transactional // 주의 ######
@AutoConfigureCache
@AutoConfigureDataJpa
@AutoConfigureTestDatabase
@AutoConfigureTestEntityManager
@ImportAutoConfiguration
public @interface DataJpaTest {
// ...
}
@Transactional 이라는 어노테이션이 들어가 있으므로 테스트 코드 상의 init메서드와 test메서드가 트랙잭션으로 묶여 있기 때문이다.
더욱 정확하게 말하자면 Spring Data JPA 에서 트랙잭션에 Persistence Context 라는 게 있다. 같은 트랜잭션에서 save 할 경우 1차 캐시에 해당 정보가 캐싱 됨으로 같은 트랜잭션에서 Author를 가져오기위해 캐싱된 데이터를 가져오지 굳이 쿼리를 통해 가져올 필요가 없기 때문이다.

그렇다면 별도의 Controller 를 생성해서 확인해보자.
Transaction 분리
@RestController
@RequiredArgsConstructor
public class BookController {

    private final BookRepository bookRepository;

    @GetMapping
    public List<Book> findAll() {
        return bookRepository.findAll(); // 이 부분 만 Transaction
    }

}

// Hibernate: select book0_.id as id1_1_, book0_.author_id as author_i3_1_, book0_.title as title2_1_ from book book0_
// Hibernate: select author0_.id as id1_0_0_, author0_.name as name2_0_0_ from author author0_ where author0_.id=?
// Hibernate: select author0_.id as id1_0_0_, author0_.name as name2_0_0_ from author author0_ where author0_.id=?
해당 메서드를 실행하면 로그창에 쿼리가 3번 나가는 것을 볼 수 있다.
이유는 ManyToOne 의 기본 Fetch 속성이 EAGER 인데 Book의 엔티티 2개를 쿼리 1개로 가져왔고, 해당 Book 객체를 가져오고 해당 객체 내부에 Author 를 가져와라 라는 속성의 EAGER 속성에 의해 객체 2개 별로 Author 를 가져와야 하기에 추가적으로 쿼리 2번이 나갔다.
이는 만약에 가져오는 Book 갯수가 100개라면 ?
1 (Book List 쿼리) + 100 (Book의 Author를 가져오는 쿼리) = 101 개의 쿼리가 나가게 된다.
이것이 바로 그 유명한 N+1 문제이다.
해결방안
그렇다면 EAGER로 인한 문제라면 우선 Fetch 속성을 LAZY 로 바꾸면 어떨까?
@Entity
@Getter
@NoArgsConstructor
@ToString
public class Book {

    @Id @GeneratedValue(strategy = GenerationType.IDENTITY)
    private Long id;

    private String title;

		@ManyToOne(fetch = FetchType.LAZY) // EAGER -> LAZY 변경
    private Author author;

    public Book(String title, Author author) {
        this.title = title;
        this.author = author;
    }
}
이렇게 다시 호출을 하면
No serializer found for class org.hibernate.proxy.pojo.bytebuddy.ByteBuddyInterceptor
and no properties discovered to create BeanSerializer
(to avoid exception, disable SerializationFeature.FAIL_ON_EMPTY_BEANS)
(through reference
chain: java.util.ArrayList[0]->
com.github.mdjoo0810.fetch_join.entity.Book["author"]->
com.github.mdjoo0810.fetch_join.entity.Author$HibernateProxy$Bu50F9Zf["hibernateLazyInitializer"])
위와 같은 프록시 에러가 발생하는 것을 볼 수 있다.
왜? Persistence Context에 Author에 대한 정보가 없기에 에러가 발생한다.
DTO 활용
일단 Author 가 필요 없고 Book 만 필요하다면?
이런 상황에서는 DTO 사용으로 해결이 가능하다.
우선 DTO 를 생성
@Getter @Setter
public class BookDTO {

    private Long id;
    private String title;

}
Controller 부분에 객체 컨버팅
@RestController
@RequiredArgsConstructor
public class BookController {

    private final BookRepository bookRepository;

    @GetMapping
    public List<Book> findAll() {
        return bookRepository.findAll().stream()
            .map(b -> modelMapper.map(b, BookDTO.class))
            .collect(Collectors.toList());
    }

}
// Hibernate: select book0_.id as id1_1_, book0_.author_id as author_i3_1_, book0_.title as title2_1_ from book book0_
호출해보면 쿼리가 한번 나가는 것 확인 가능하다.
대신 기존은 Response 가 아래와 같았다면
[
	{
		"id": 1,
		"title": "title1",
		"author": {
			"id": 1,
			"name": "author1"
		}
	},
	{
		"id": 2,
		"title": "title2",
		"author": {
			"id": 2,
			"name": "author2"
		}
	},
]
DTO 를 사용하면
[
	{
		"id": 1,
		"title": "title1"
	},
	{
		"id": 2,
		"title": "title2"
]
로 변한 것을 확인할 수 있다.
그런데 만약 모든 데이터가 필요하다면?
EntityGraph
public interface BookRepository extends JpaRepository<Book, Long> {

		// ...

    @EntityGraph(attributePaths = {"author"})
    List<Book> findAll();

}
@RestController
@RequiredArgsConstructor
public class BookController {

    private final BookRepository bookRepository;

    @GetMapping
    public List<Book> findAll() {
        return bookRepository.findAll();
    }

}

// select book0_.id as id1_1_0_, author1_.id as id1_0_1_, book0_.author_id as author_i3_1_0_, book0_.title as title2_1_0_, author1_.name as name2_0_1_ from book book0_
// left outer join author author1_ on book0_.author_id=author1_.id
위의 코드를 적용하고 호출하면 쿼리 1개가 나가는 것을 볼 수 있다.
여기서 EntityGraph를 사용하면 선언한 Attributes에 대해서는 EAGER 속성을 넣어준다.
실제로 나가는 쿼리를 살펴보면 left outer join을 통해 가져온다.
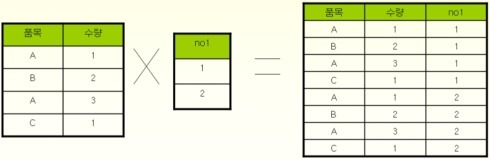
하지만 이 EntityGraph는 카테시안 곱의 문제가 별도로 발생한다.
이 부분은 연관관계를 재 정의해야 하기 때문에 별도로 정리하도록 하겠다.
FetchJoin
public interface BookRepository extends JpaRepository<Book, Long> {

    @Query("SELECT distinct b FROM Book b JOIN FETCH b.author")
    List<Book> findAllFetchJoin();

}
@RestController
@RequiredArgsConstructor
public class BookController {

    private final BookRepository bookRepository;

    @GetMapping
    public List<Book> findAll() {
        return bookRepository.findAllFetchJoin();
    }

}

// Hibernate: select distinct book0_.id as id1_1_0_, author1_.id as id1_0_1_, book0_.author_id as author_i3_1_0_, book0_.title as title2_1_0_, author1_.name as name2_0_1_ from book book0_
// inner join author author1_ on book0_.author_id=author1_.id
가장 유명한 Fetch Join 방식이다.
inner join 을 통한 구문으로 쿼리 1번에 모든 데이터를 가져올 수 있다.
추가적으로 Properties 에 hibernate.default_batch_fetch_size 를 통해 전역적으로 n + 1쿼리에 대해 in 쿼리를 통해 줄여주는 방법도 있습니다.
실무 활용법
그래서 저는 실무에서는 아래와 같이 사용하고 있습니다.
- 혹시 모를 상황에 대비해 hibernate.default_batch_fetch_size 를 통해 전역으로 관리
- @OneToOne, @ManyToOne와 같은 관계에서 자식 엔티티에 대해서는 Fetch Join을 적용하여 관리
- @OneToMany, @ManyToMany와 같이 N 관계의 자식 엔티티에 관해서는 데이터가 많은 자식쪽에서 Fetch Join 사용
- 추가적으로 직접적으로 JPQL을 작성하는 것 보단 조회에 대한 쿼리는 QueryDSL을 통해 작성하고 있습니다.
모든 코드는 아래 링크에 있습니다.
https://github.com/mdjoo0810/java-study-all/tree/main/fetch_join
'JPA' 카테고리의 다른 글
| QueryDSL을 쓰다보니 Q-Class가 뭘까 싶네? (0) | 2022.03.23 |
|---|---|
| Spring JPA - Hibernate 에서 field가 Enum일때 @ColumnDefault는 어떻게? (0) | 2021.04.22 |